* Air-Cooled, High Frequency, Spindle Motor, New !!
Special For Metal Cutting, Numerical Engraving, Grinding, Milling


– Power : 0.7Kw, Phase 3
– RPM : 18000
– Frequency : 2P, 300Hz
– Current : 2.7A
– Voltage : 220V
– Collet : S40(ER16)
* Air-Cooled, High Frequency, Spindle Motor, New !!
Special For Metal Cutting, Numerical Engraving, Grinding, Milling
– Power : 0.7Kw, Phase 3
– RPM : 18000
– Frequency : 2P, 300Hz
– Current : 2.7A
– Voltage : 220V
– Collet : S40(ER16)
Air-Cooled Spindle Motor, 1.5KW, ER20, GDZ93 x 82-1.5
http://www.cnc4youstore.com/air-cooled-spindle-motor-1.5kw-er20-gdz93-x-82-1.5.html

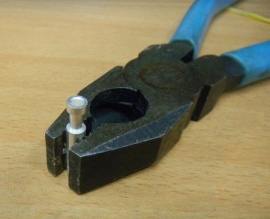
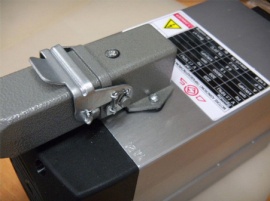
1. Put the rubber band to pinchers as the picture.

2. The pin of connector puts in the pinchers.
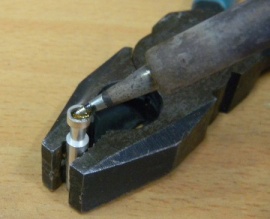
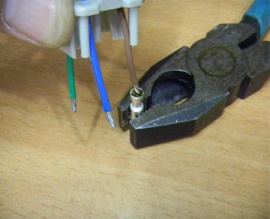
3. Solder appropriate leads into hole by use of a soldering iron.
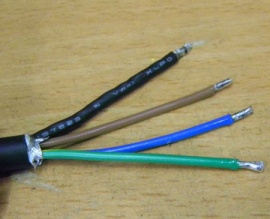
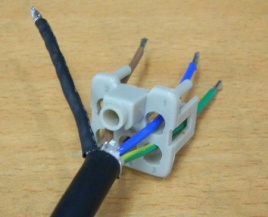
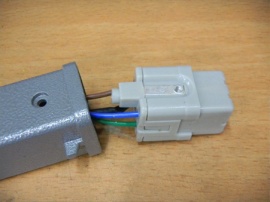
4. Prepare for cables.
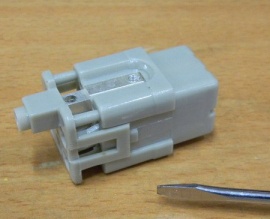
5. Loosen a screw in connector housing.


6. Seperate the part of back in housing by a flat-head screwdriver.
— Take out carefully not to do by force.
7. Put each cable into the seperated housing to fit 1. 2. & 3.
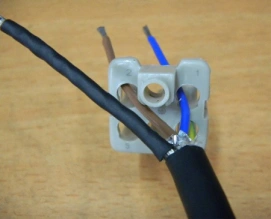
8. Put the last part of cable to pin and solder.
You can do well if both an iron & cable reached at the same time.
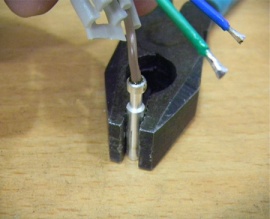
9. Other pins do same and check soldering state whether it takes out or not.
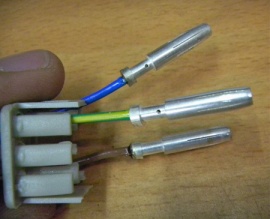
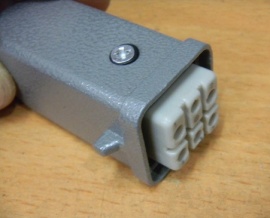
10. Place pins as the picture.
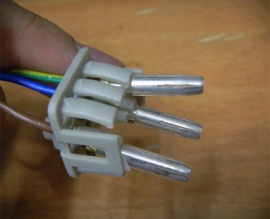
11. Put them into connector housing to fit directions.
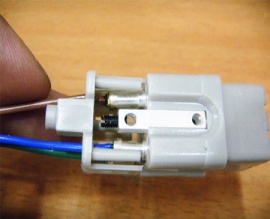

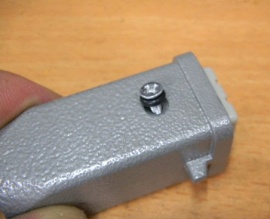
12. Screw it as the picture by use of a small a flat-head screwdriver.
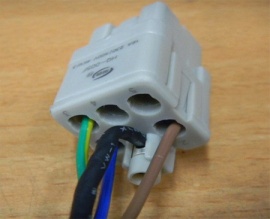
13. Cover a connector case.
14. Screw
15. Screw the fixed part in cable.
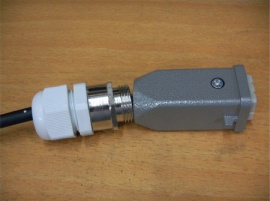
16. Completion.
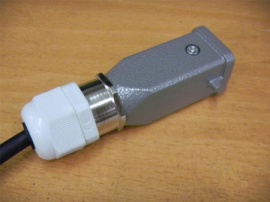
17. Equip to spindle.
Work checking in reverse order in case you put it together again after taking out.
